Pan Cooked Steak: 5 Simple & Delicious Steps
Master the best pan cooked steak methods! From seasoning to searing, learn to achieve the perfect steak every time… most of the time.
Prep work
Mastering a good pan-seared steak is a rite of passage for any guy who wants to not look completely helpless in the kitchen. Sure, I might burn toast and set off smoke alarms making eggs, but steak? That’s different. That’s where you prove you’re not completely useless with fire and meat.
Everyone’s got an opinion about the “right” way to cook steak. People fight about cuts, argue about rubs, and get religious about marinades. Meanwhile, I’ll be over here actually eating a perfectly cooked piece of beef instead of debating it to death.
Let me take you through what actually matters, before we fire up the stove. Picking the right cut and seasoning your steak right is key.
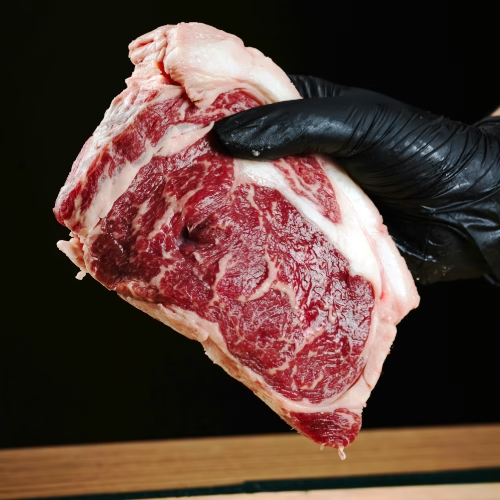
Choosing the Right Cut
What you choose, cut-wise, pretty much shapes your whole steak experience, from taste to texture. Here’s a breakdown of what fits where:
For the gang coming over: Rib-eye or sirloin. These cuts have enough beef flavor to make everyone shut up and eat. They’re forgiving if you’re not a grill master, and they look impressive without trying too hard.
For date night: Filet or Porterhouse. These are the fancy cuts that melt in your mouth and make you look like you actually have your shit together. Worth the extra cash when you’re trying to impress.
For everyday weeknight cooking: Flank or skirt steak. Cheaper, but they need a little more attention to not turn into shoe leather. Perfect for when you want steak but don’t want to blow your grocery budget.
When I’ve got the gang over for steaks, I’ll grab a rib-eye every time or a tomahawk. These cuts are beefy goodness personified, and when done right, they are smokin’ good! But if it’s a cozy dinner date, I lean toward the filet or a Porterhouse, to make EPIC lil’ melt-in-your-mouth bites (The Kitchn).
Seasoning Techniques
This is where you turn a piece of meat into actual food. Your seasoning can take your steak from “meh” to “holy shit, did you really make this?”
For thicker cuts like rib eye or sirloin: Salt that bad boy a few days ahead if you can plan that far in advance. The salt works its way in and does magical things to the flavor. If you can’t plan ahead, at least give it 40 minutes before cooking.
For thinner cuts like flank or skirt: Season right before cooking, or throw them in a quick marinade if you want to get fancy.
My go-to seasoning? Salt, freshly cracked black pepper, thyme, rosemary, and a touch of garlic powder. Don’t be shy about it, every part of that steak should get some love. If you’re not seasoning like you mean it, what’s the point?
If this is for a date night please make your you have checked out the Men’s Style tips we provide for all of you Snazzy guys! If it’s more smart casual, I’ve got you covered here. Dressing Snazzy: Landing Smart Casual Looks for Men!
Essential Tools for Pan-Seared Steak
You don’t need a lot of fancy shit, but you need the right shit:
- Pan: Cast iron or heavy stainless steel. Non-stick pans are for eggs, not steaks. You need something that can get screaming hot and hold that heat.
- Oil: High smoke point oils only—avocado, canola, or peanut oil. Save the olive oil for salads. It’ll burn and make your kitchen smell like disappointment.
- Butter and herbs: For the end. Butter adds richness, fresh herbs add complexity. Rosemary and thyme are your friends here.
- Tongs: Flip, don’t stab. Keep those juices where they belong—inside the steak.
- Thermometer: The easiest way to not fuck this up. But if you don’t have one, I’ll teach you the finger trick.
Don’t go packing that pan like it’s a clown car. If you need to cook more than one steak, space them out or go one at a time. Too many in there and they’ll steam each other instead of searing. (The Splendid Table).
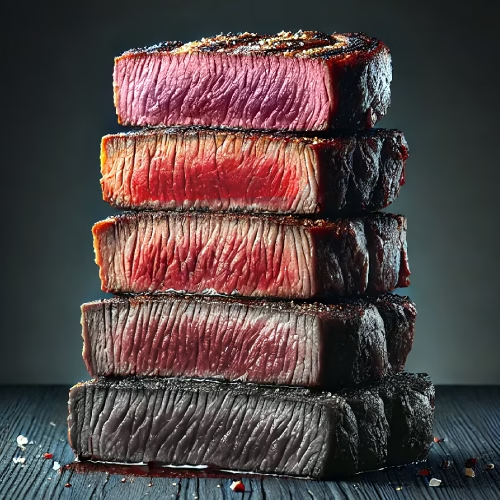
No-Tech Doneness Check: The Finger Test
Press the fleshy part of your palm below your thumb. That soft feeling? That’s rare. Now touch your thumb to your index finger—medium rare. Middle finger? Medium. Ring finger? Medium well. Pinky? Well done. Now compare that feeling to the steak with a light poke—easy and free way to check!
Rare: Soft like the base of your thumb.
Medium Rare: Slightly firmer, like pressing your index finger to your thumb.
Medium: Firmer still, like pressing your middle finger to your thumb.
Well Done: Very firm, like pressing pinky to thumb.
Cooking Step-by-Step
Get That Pan Screaming Hot
Heat your pan on high for 3-5 minutes until it’s smoking. Add just enough oil to coat the bottom. We’re talking a thin layer, not a swimming pool.
2. Sear it – Like it’s Damned
Drop that steak in the pan and DO NOT TOUCH IT for 3-4 minutes. I don’t care if it sounds like it’s dying, leave it alone. Flip once and repeat on the other side. Don’t forget to sear the edges for 1-2 minutes each.
For thick steaks (over 1.5 inches), lower the heat after searing and cook for another 2-3 minutes per side.
3. Add the Good Stuff (Don’t Skip This)
Reduce heat slightly. Add butter, a smashed garlic clove, and fresh herbs. Tilt the pan and spoon that butter over the steak repeatedly. This is called basting, and it’s what separates decent steak from restaurant-quality steak.
4. Check Your Work
Use a thermometer or the finger test. Here’s what you’re aiming for:
| Doneness Level | Temperature (°F) |
| Rare | 120-125 |
| Medium Rare | 130-135 |
| Medium | 140-145 |
| Medium Well | 150-155 |
| Well Done | 160+ |
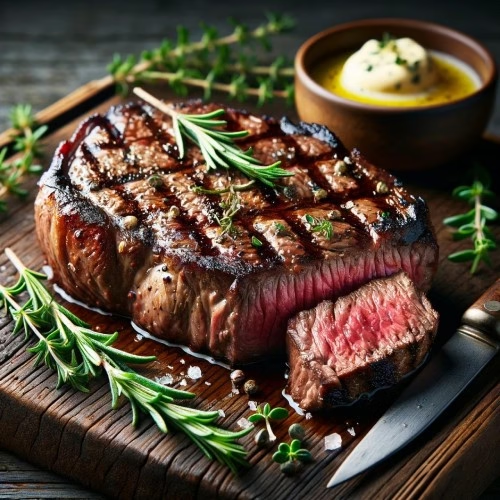
5. Rest the Steak – (This Is Not Optional)
Remove from heat and let that steak rest for 5-10 minutes before slicing. This isn’t some chef bullshit—the juices need time to redistribute so every bite is juicy instead of bleeding all over your plate.
When you slice, cut against the grain. This shortens the muscle fibers and makes it easier to chew. It’s the difference between tender bites and working your jaw like you’re chewing gum.
Check out these target temps to nail your steak’s ideal doneness:
The Rules That Matter
- Pat your steak dry before cooking. Wet steak steams instead of sears.
- Don’t crowd the pan. Cook one at a time if you have to.
- For a better crust, press down lightly with tongs during searing.
- Add butter and herbs at the end so they don’t burn.
- If you don’t have a thermometer, learn the finger test. It’s not perfect, but it beats guessing.
- Let it rest. Seriously. Don’t skip this step.
- Slice against the grain for maximum tenderness.
Check out “The Reverse Sear: The Best Cooking Method” for Steak a just damn tasty read at artofmanliness.com.
Quick summary of the searing process:
| Step | TIME | TEMP | TIP |
|---|---|---|---|
| Searing one side | 3–4 Mins | High | Oil should shimmer |
| FLIP & SEAR AGAIN | 3 Mins or till Med Rare | High | Use tongs to flip |
| Edges / Rendering fat | 1–2 mins per side | High | Hold upright w/ tongs |
Well Done Pan Cooked Steak…
I know I keep going on about this placing being inclusive and accepting but… No
I say “Good day!”
Final Thoughts
You’re now officially dangerous with a skillet. Whether you’re working with a fancy filet or fighting a chuck steak into submission, just remember: season like you mean it, sear like it matters, and rest that beauty like it just finished a workout.
Now go forth and cook steak responsibly …unless you’re planning to cook it well done. Then we can’t be friends.